How to Choose a Good Target Image for Tracking in AR - Part 3
This article is part of a series that discusses the theories and practical examples on improving AR image tracking. Please refer to Part 1 for introduction.
In this part of the series, we will discuss the characteristics of images that affect the tracking quality. Let's get started!
Quick Summary from Part 2
In part 2, we explained the fundamental principles in image tracking, and concluded that a good target image should contains:
- good feature points that are distinguishable
- a lot of good feature points, together the image as a whole can be located
- a lot of good and well distributed feature points, to make it error tolerant.
With this in mind, let's see how we can translate these properties into higher level characteristics of images.
Characteristics of good target images
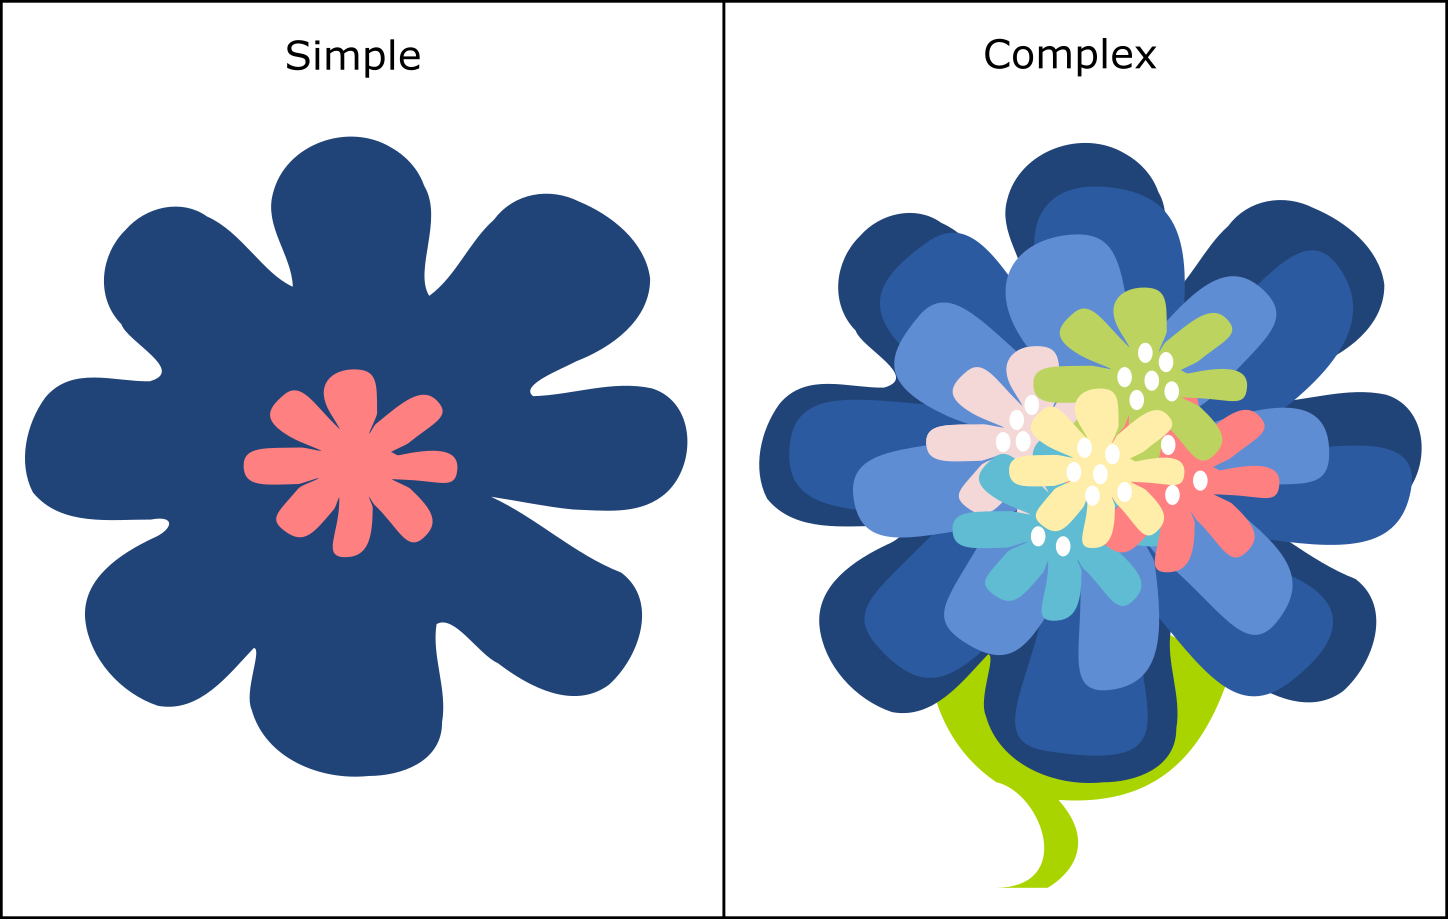
Complex
First rule, the more complex the image is, the better. What do you mean by complex? Just more dots, more lines, more shapes, more anything. High quality feature points exist on locations where there are lots of changes. Having more details will give you more feature points. Period.
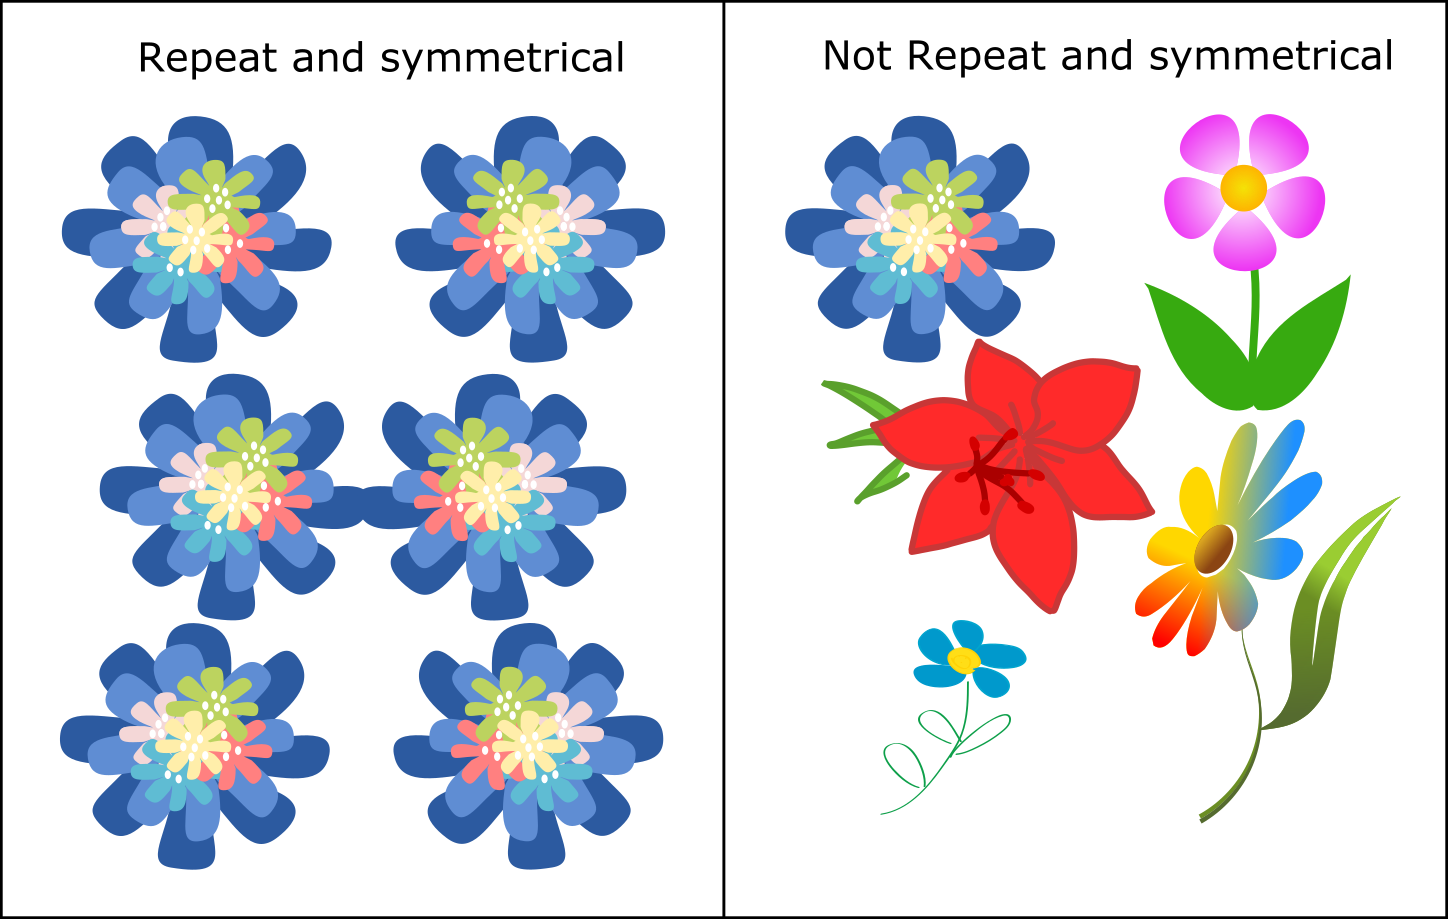
No Repeatitive and Symmetrical Patterns
Second rule, avoid repeatitive and symmetrical patterns as much as possible. Feature points need to be distinguishable. Repeating patterns mean there will be feature points that look the same, which confuses the AR engine when it comes to matching. On the other hand, vertical and horizontal symmetries forbid the engine from deciding the correct orientation.
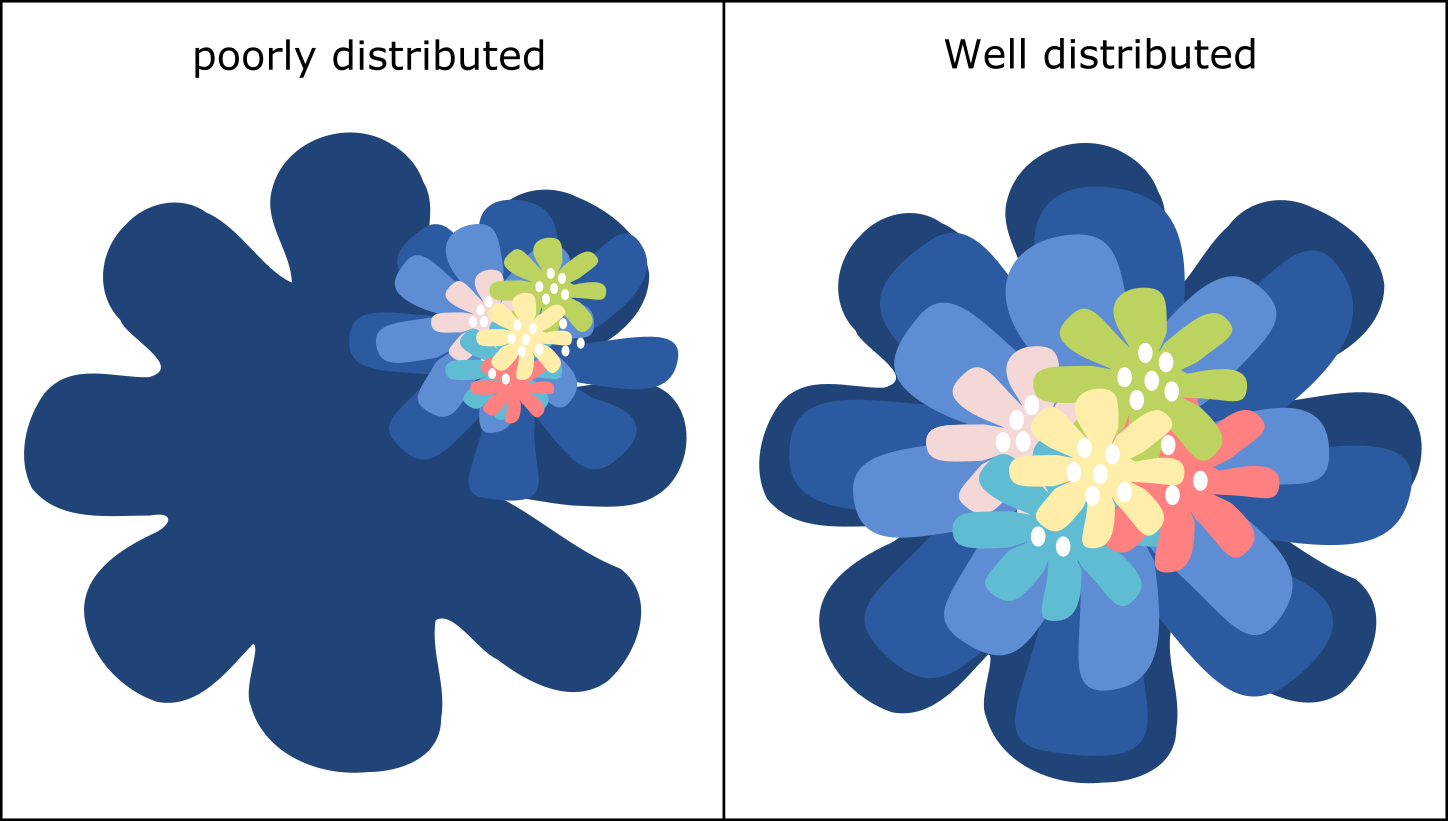
No blank space
Third rule, avoid blank space as much as possible. Well distributed feature points are more error-prone. Furthermore, blank space on the peripheral area is even worse, so try to ensure you have at least some good feature points around the edges.
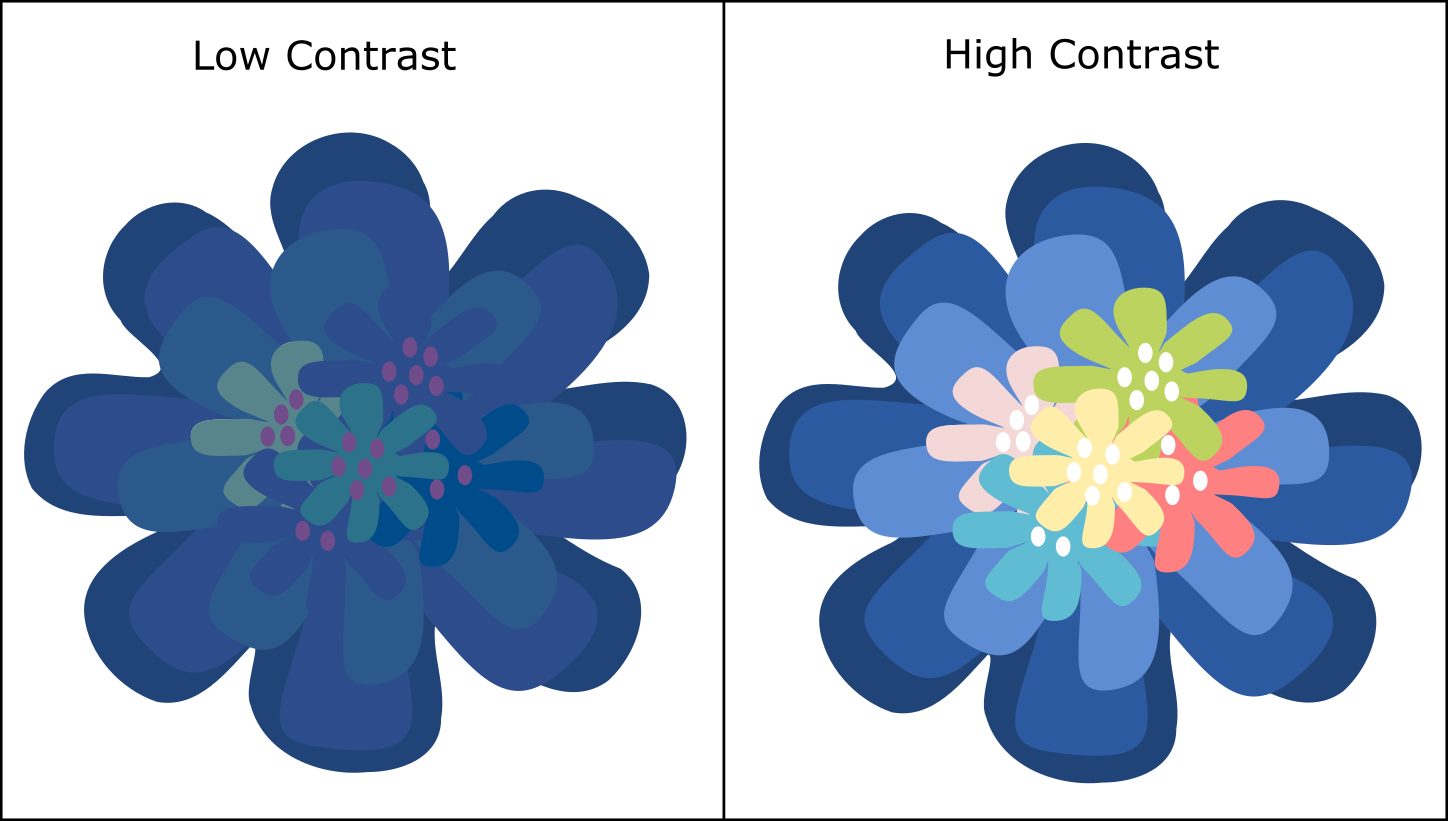
High Contrast
Fourth rule, contrast is good. As mentioned before, most high quality feature points exist on positions where there are changes. They are mostly being found on corners and edges. High contrast can make them more prominent.
Characteristics that are irrelevant
Besides those good characteristics that you should be aware of. It's also important to point out some other characteristics that might seems helpful, but are actually irrelevant.
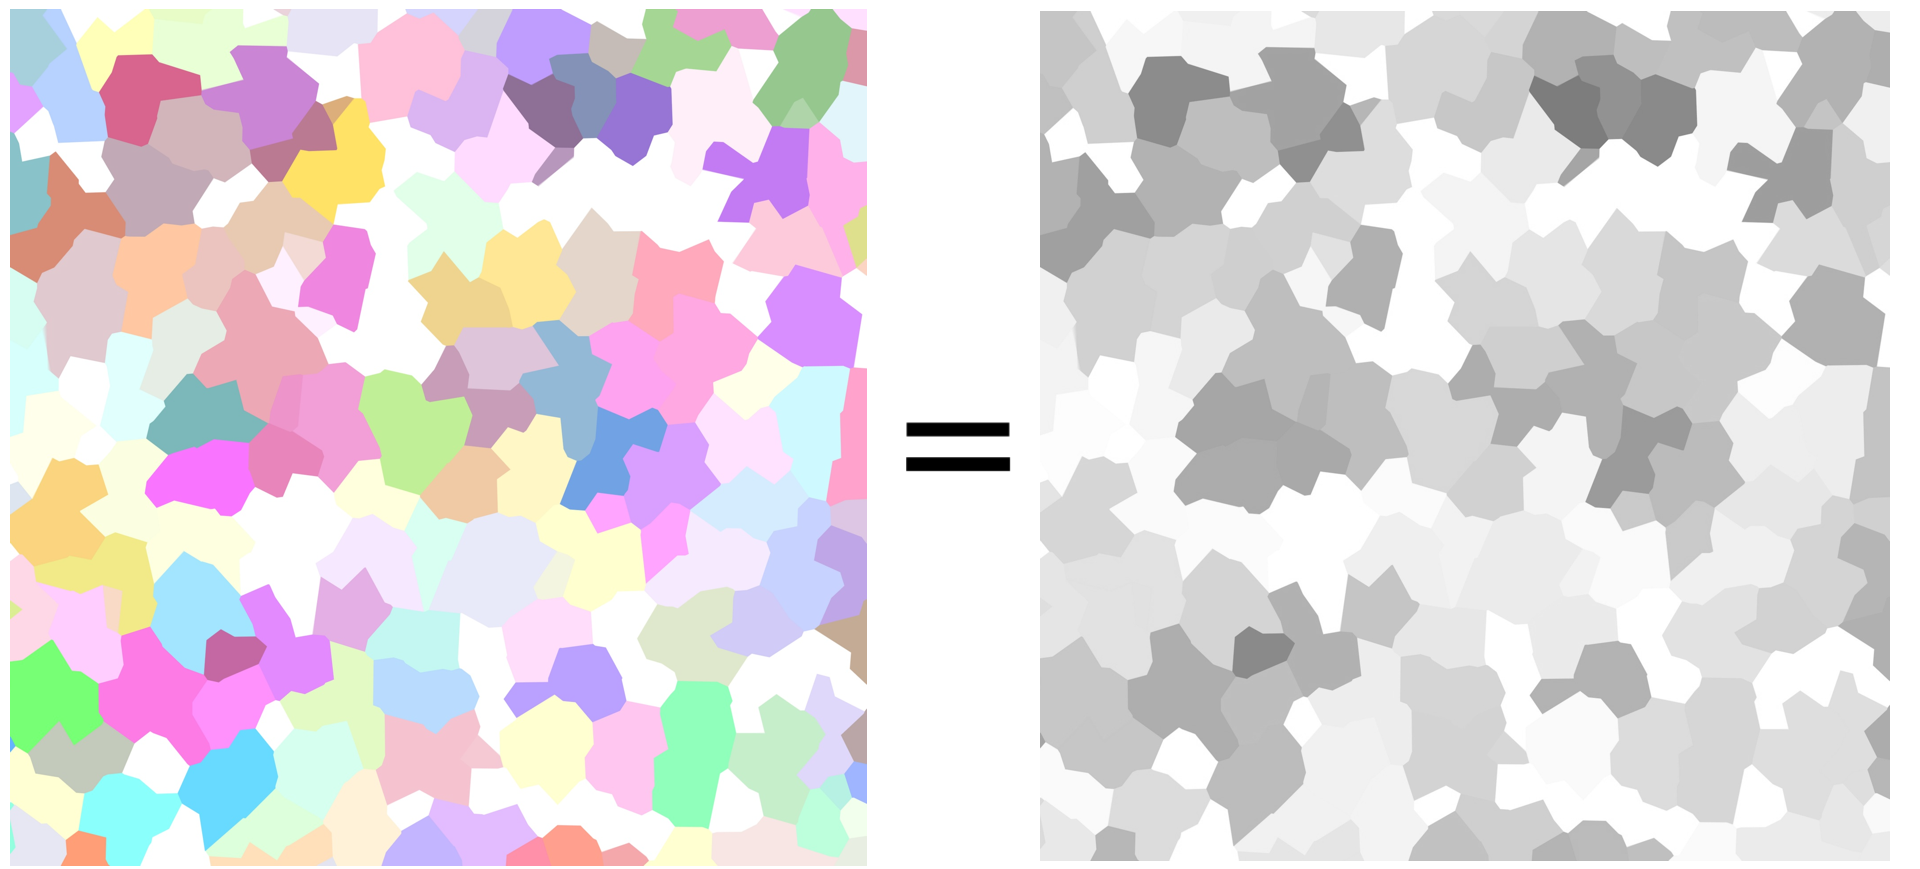
Colorful
It's generally useless to make the image colorful. Most, if not all, AR engines don't care about color. They probably turn images into grayscale before processing. The reason is that color is highly subjective to changes in different lighting conditions. Even said that, colorful images sometimes imply higher variations when being converted into grayscale. Just be aware of that fact that only the relative intensity of the pixels matters at the end.
Gradient
Only sharp changes matter. Gradual changes mean no changes. Image like this might looks very textural, but it's very bad in terms of detecting feature points. So if you try to improve a plain image by using gradient color, it's probably useless.

Other Considerations
Image Resolution
Image resolution is usually not a critical factor. As a rule of thumb, it will be good enough if the width and height of your image is at least 1000px.
You surely don't want the resolution to be too low, say 100px by 100px. Think about it this way, let's say your phone camera resolution is 1080 x 1920. Your target image somehow needs to scale up to roughly equal size to perfectly match the video feed. But your target will be blurry in that scale. However, you don't need to overthink this issue. Most advanced AR engine can cope with scaling pretty well.

On the other hand, it usually doesn't hurt to have images that are too high resolution. However, it doesn't help neither. Because most device simply don't have that high computing power to make use of that. Also, the camera resolution just couldn't match that. So most likely the AR engine will scale down your image to an appropriate level anyway.
Aspect Ratio
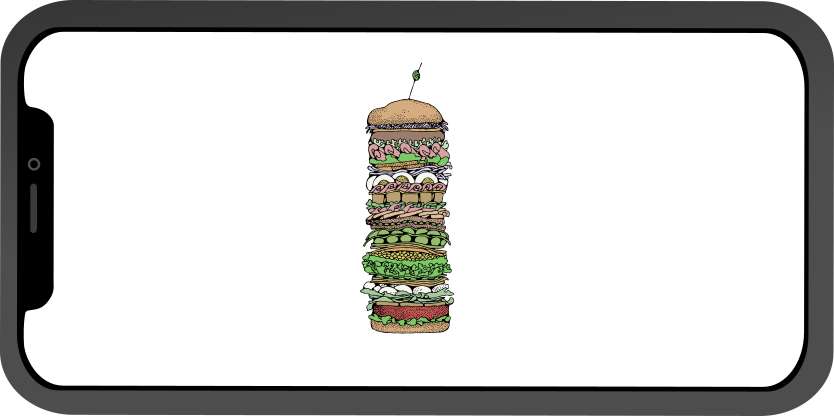
In theory, aspect ratio has nothing to do with feature points detection and matching. But in practice, it has a close relation with the device camera feed. Think about looking at a very tall target image in a mobile phone in landscape orientation. There are two possibilities:
In the first case, the whole target fit inside the screen. In this case, there will be a lot of unused spaces. If it is a real environment, those spaces probably will not be empty, but containing other background objects. It also implies that there will be a lot of incorrect matches outside the target area.
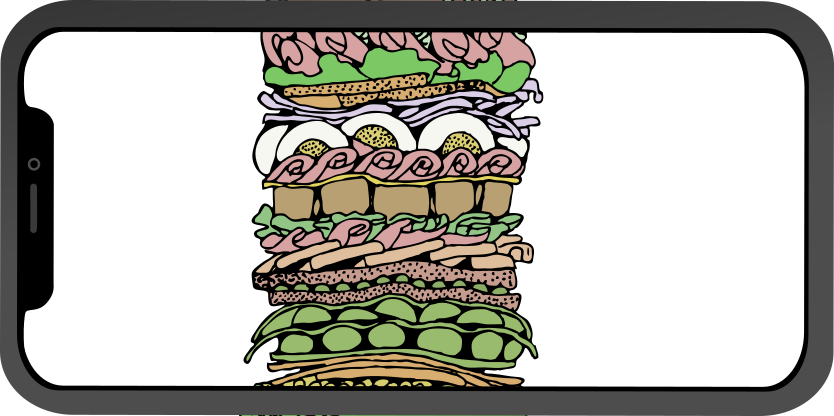
In the second case, the camera only captures part of the target. In this case, a lot of useful feature points might have missed because they are outside the screen.
Again, you don't need to overthink this issue neither. Normally, you don't need to the whole target to track. A good AR engine probably has some way to cope with the issue. But still, it's wise to avoid extreme aspect ratio. In general, I would recommend a square target image because it works well in both landscape and portrait mode.
Target placement
Where is the target image being placed ultimately in the physical world is also something to be aware of. Is it a book cover, a poster or a card, etc. Are you going to print it out or just use it digitally on electronic screens?
If you are going to print it out, is the printed material flat and rigid? The shape of a thin paper might get distorted easily. Will the target be very small like a stamp? Is the target surface reflective to light? A lot of time, lighting could have an adverse effect on tracking. Bottom line is: does the target captured in camera look alike the original image.

Fix the problems
Finally, don't get frustrated if you found that your target image is not very good. Sometimes it's actually pretty easy to fix. Here are two tricks that I always use:
- If the image is too plain, consider adding a background.
- If the image has blank space on the edge or weird aspect ratio, consider cropping the center. You might not need to track the whole image.
If nothing works, you might probably still need to change the design. But the good thing is that now you know how to make the changes.
Summary
I hope the above tips can help you choose an image wisely in your next project. In the next article, I will introduce a tool to automatically analyze the characteristics we discussed.